No Products in the Cart

As you might have seen we have a new product in the web shop. We started selling this product because it is both cheap and very feature rich. This product is of course the Raspberry Pi Pico (with Enclosure) with a open-source software for use in arcade stick / fight sticks.
PCB and Software
The Raspberry Pi Pico pcb is pretty strait forward, just hook up the cables to the pins, a usb cable and you are set to go. The foot print and ease of updating it also makes it a great board not just for MiSTer but other systems as well like PS3, Android, PC et.c.
The open source software, which you will find here, is very strait forward and easy to manage through the built in setup by using a browser window on your computer.
Another nice thing about this board/software is also that not only does it hook up to all your buttons and joystick, it has special features like Player LEDs, Turbo support and the feature of adding a small (monochrome) OLED screen so while the size of the board is small it really packs a punch.![]()
Enclosure
Mounting the pcb by itself can be done with small screws but an even better way would be to use an Enclosure, this way it will not only look good but it will make it easier. The Enclosure is printed out in seven different colors with 2mm wall thickness and it consists of a bottom part, a lid and a small button.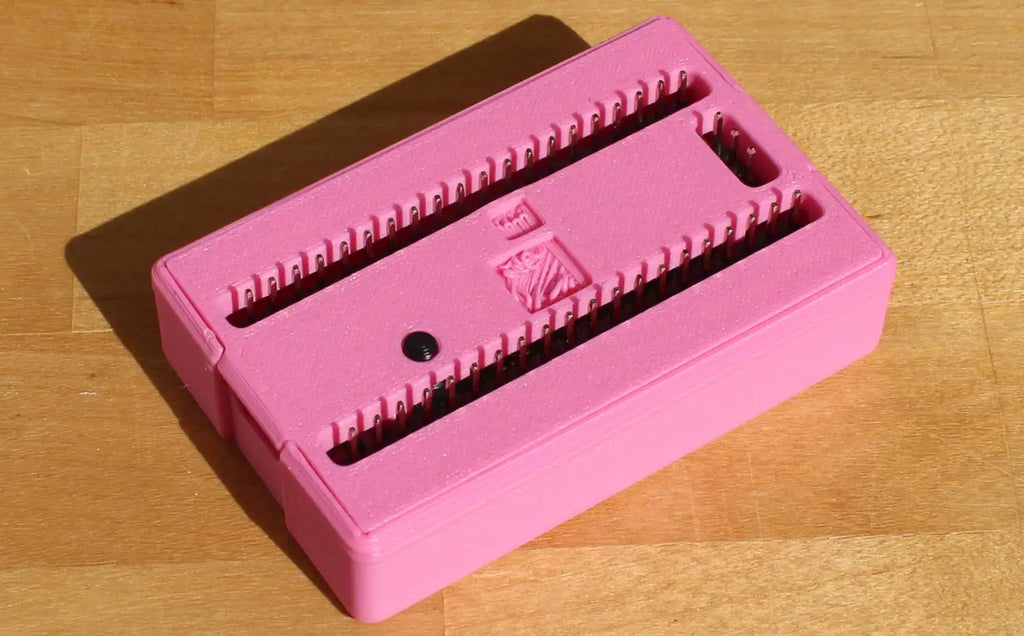
Enclosure in Pink. Standard Black or White always looks good but this color made this specific build look much better (I think).
The Build
After understanding the pinout it was pretty strait forward to put it all together. I chose the pink Enclosure as it goes together with the color on the gate on the joystick (a Black Enclosure could also be used but the pink one gives it a little bit more charisma). Other than wiring up the joystick and buttons I also wired up a mechanical switch (for switching between DP, LS and RS) and a 1.3" OLED screen to visually see when the joystick and buttons are used. A usb cable (Micro B to USB A) was added afterwards as well (not shown in the pictures).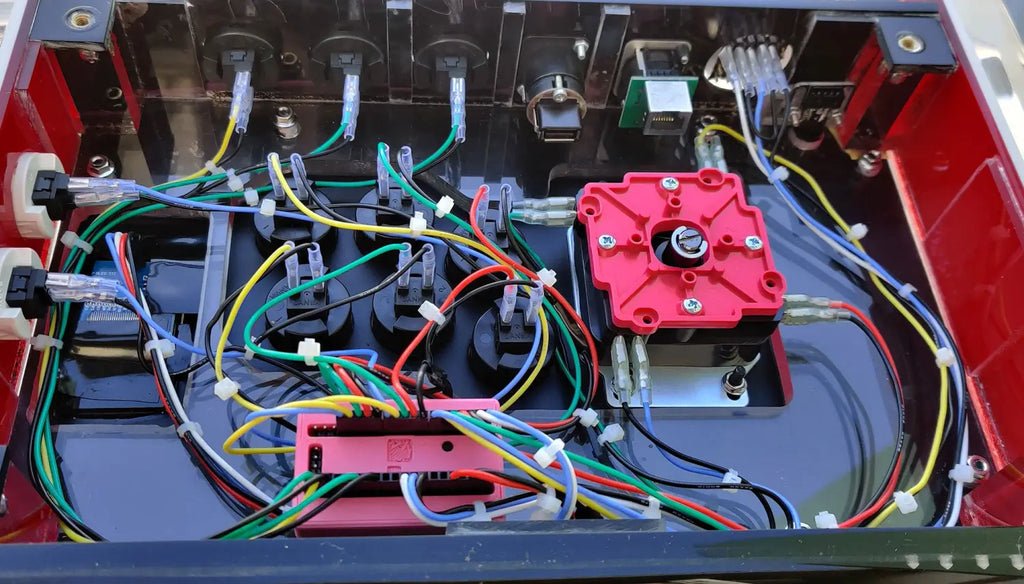 Picture of the setup. The Enclosure is fastened with a screw through a hole on the bottom part and everything else is pretty straight forward. Harness done specifically for this setup as well.
Short clip of what the small OLED screen displays while "On". Custom solutions for what is showing on the OLED screen is possible.